Getting started
Contact us to get started!
client_id and client_secret to begin testing integration.
We will also need a redirect_uri from you.
Authorization Flow

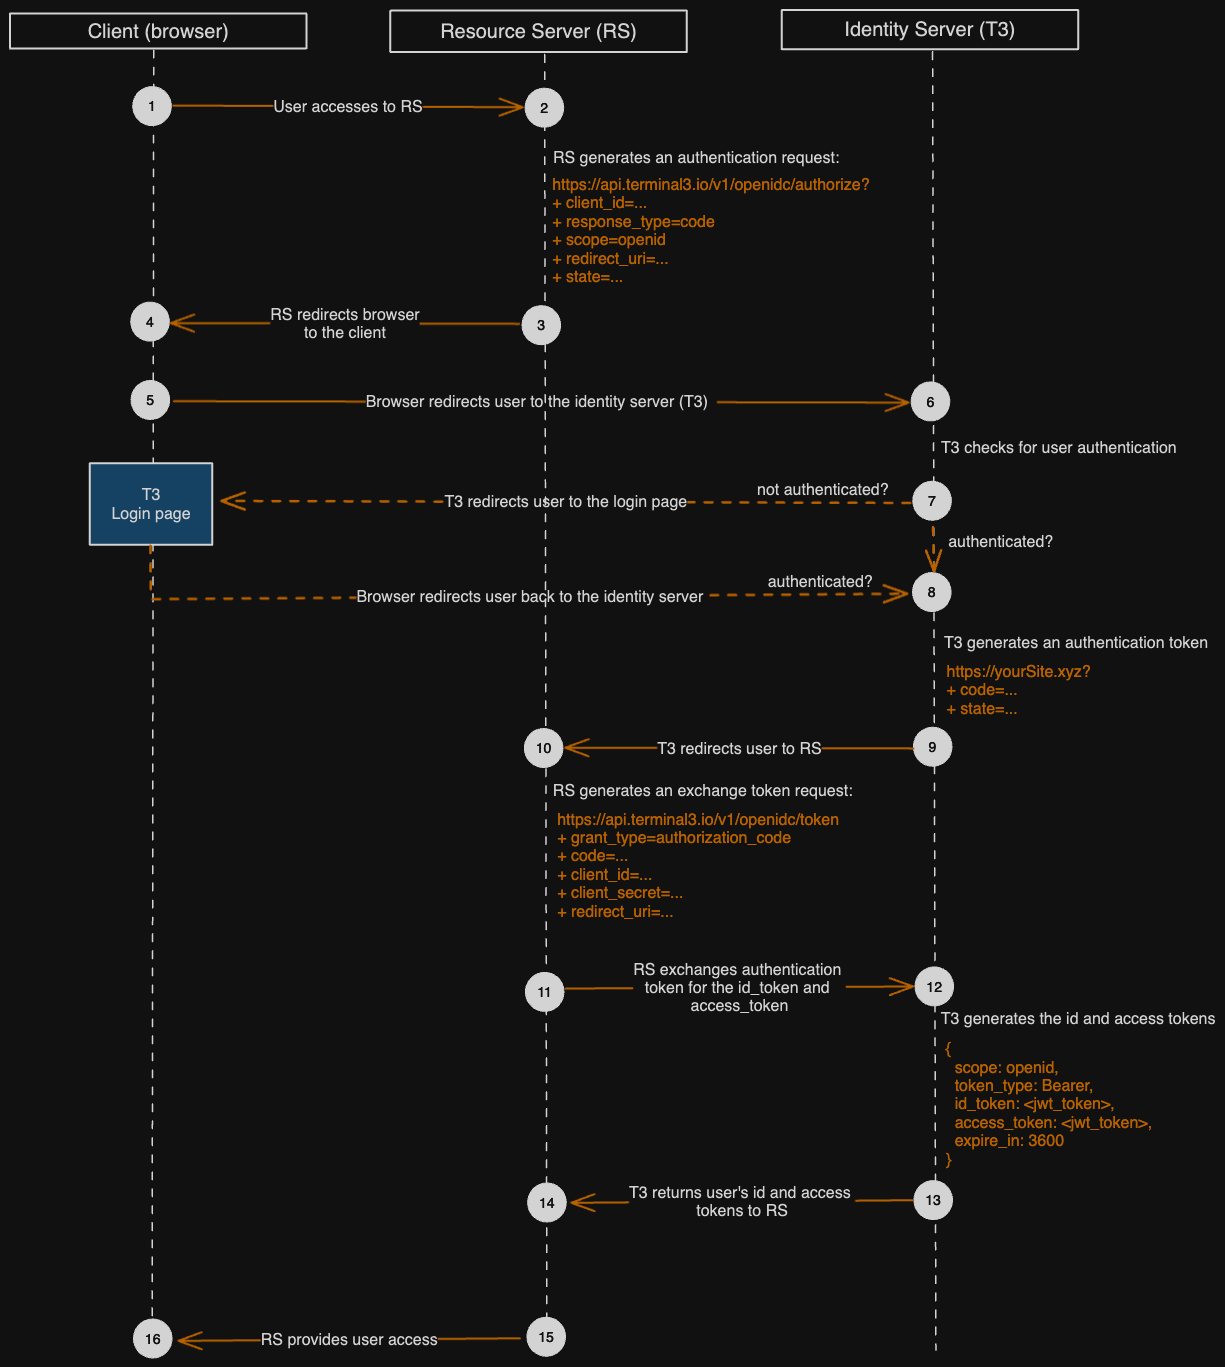
Example user scenario
Assume a user creates an account via a white-labeled onboarding process powered by Terminal 3. After successful sign up, we may redirect the user to your proprietary website, such as a User Dashboard screen.We generate a “magic” link for the user to continue
https://api.terminal3.io/v1/openidc/authorizewith the following parameters:response_type=codescope=openidclient_id=<your client ID>redirect_uri=https://yourSite.xyz/callbackstate=<your state> (optional)
Terminal 3 authenticates the user and redirects them to your site
The user will be redirected to the provided
redirect_uri with a one-time code (valid within 5 minutes) and state (if applicable)https://yourSite.xyz/callbackwith the following parameters:code=<a generated one-time code>state=<state from Step 1>
If a user does not have an existing session, they will be directed to the login page first.
Request Terminal 3 to exchange a one-time code for the access token
grant_type=authorization_codecode=<a generated code from Terminal 3>client_id=<your client ID>client_secret=<your client secret>redirect_uri=https://yourSite.xyz/callback
Note, we are using our
v2 API here for the token instead of v1id_token is a JWT token that contains basic information about the user, including:<yourNamespace>_username is an example application-specific data field you may choose to useaccess_token is a JWT token used for accessing a particular resource via the Terminal 3 API.Validating access token
To make sure the token is provided by Terminal 3 before proceeding, you can obtain the public keys from Terminal 3 and use them to verify the token:Requesting proprietary data fields
After having an access token, you may call the Terminal 3 API to get proprietary application-specific data fields (e.g.<yourNamespace>_username).
Please discuss with us what your specific business needs are.